29.12.09
Happy Holidays!
There's nothing like undertaking an "emergency" quilting project right before the Holidays. My family draws names for gifts and I had drawn my sister's name. She wanted something "Christmas-y" and I debated for a loooong time on a homemade vs a store bought gift. Finally, I came across this pattern in an older issue of American Patchwork & Quilting and decided to go for it. I was sewing like crazy (and cursing myself) up until 2 days before Christmas.
Fabrics are all from my stash.
Oh, and why not attempt needle turn applique for the first time on a tight deadline? Actually, I used freezer paper technique for the leaves, and used a running stitch around the berries with the thread drawn in over the template to make the circle shapes. This was supposed to yield a perfect circle, but mine were still pointy in spots.
Backing and binding fabrics (Heather Bailey's Garden Pop) I had originally intended to make into an apron, but I thought worked well here -- not to Christmas-y as I didn't use any specifically Christmas-themed fabrics on the front. I used Mono-filament thread to quilt in the ditch around the squares and white thread for the freemotion design in the center applique square.
Of course, Axel had to get in the action.
30.11.09
Snowball quilt top completed!
And another quilt top ... done!
Here it is:
This quilt has been in the works for at least a year and I started collecting fabrics for the snowballs probably 2 years ago. I had something very specific in mind combining pinks, greens, and gold florals and dots and combining them with hand dyes.
I didn't want any white on this quilt - although there are small bits. I don't know if I'm the only one, but I'm tired of looking at quilts with a lot of white used for negative space. Although using white can be very striking, to requires a little bit more creativity to avoid it, and the end result I thought, was worth it.
I ran out of the gray batik (Hoffman "hippo") I wanted to use for the border blocks and had a mix-up and long wait from www.batiksplus.com before my final yardage arrived. However, they came through and sent me a few extra fat quarters for the inconvenience. If you haven't checked out Batiks Plus, they have the most comprehensive collection of Hoffman batiks anywhere.
At the farmer's market yesterday morning. Elizabeth's wearing the scarf I knitted. I think I'm officially hooked!
Look at the gorgeous citron. I asked a customer who bought a couple of these what he intended to do with them and he got a sheepish look on his face before telling that he soaks them in vodka. Whole. And they are quite large, so I'm thinking a vat of vodka!
23.11.09
Color Block quilt top - completed!
Here is its:
It's 83 x 98 and just fits on my Queen-sized bed. I would've liked a more overhang on the sides but am satisifed and ready to move on to preparing the back.
I shopped for backing fabric on Saturday at one of my favorite little fabric shops, Peapod Fabrics (http://www.peapodfabrics.com/), owned and operated by a delightful Japanese woman. I was hoping she would have the new Amy Butler Love line, but she didn't -- she did have a wonderful selection of fabrics though -- so I auditioned my quilt with various options for as long as I could get away with an impatient 9-year old in tow. I decided to go with something a little muted, this from Valori Wells Del Hi line (pictured below from the Quilt Home website). I thought it fitting since I had included various Del Hi fabrics into the front of the quilt.
I can't wait to put the back together and on to the quilting. I helped my friend Amy, with her baby quilt (sock monkey) on Sunday, so my project waits for another spare moment.
5.11.09
Ninja Bean
I'm a huge fan of Rita's adorable handmade Ninja Beans. My daughter "ohhed and ahhed "over her pictures on flickr and so I decided to surprise her with a Bean of her own. Please check out Rita's beautiful work at Mochi Studios http://www.mochistudios.com/. Rita customized the doll (choice of colors, etc.) and was an absolute delight to with.
She has quickly become my daughter's constant companion, hanging out in local cafes and taking a prime spot in the bunk bed at night.
The hand-stitched details are so well thought out and executed.
Thank you, Rita!
She has quickly become my daughter's constant companion, hanging out in local cafes and taking a prime spot in the bunk bed at night.
The hand-stitched details are so well thought out and executed.
Thank you, Rita!
21.10.09
basket love
I bought myself this gorgeous African basket from an African vendor at the Quilt Festival in Santa Clara this past weekend.
The words "Bolga Basketo" are embossed in the leather handle. I just love everything about it ... the workmanship, it's colors, voluptuous shape and the look and feel of the handle when I grasp it.
I spied this same vendor at the Long Beach quilt show this summer but walked away empty-handed because I couldn't think of a way to get one of these home on the plane. So, when my sister and I walked into the Santa Clara show and saw the very same vendor of African wares, I was delighted. But we had waited until the last second to relocate the stall. With literally five minutes to go before the end of the show and stopping several times to ask for directions, we found the basket vendor again. They immediately offered me a very nice discount, although I must confess that I would've bought the basket at full price!
So what's in the basket you may ask? I bought a couple of fabrics to make an apron and an apron pattern, machine needles and a thumb protector. I thought that was pretty restrained.
I bought the Veronica apron pattern even though I really wanted the Daily Spice Halter Apron pattern by Heather Bailey http://quilthome.com/product_info.php/products_id/5664 but balked at paying $12.50. Is it just me, or is that a bit pricey for a fairly simple pattern? I've looked closer at the Veronica pattern since I brought it home, and am not sure if I like it all that much.
If anyone have any good recommendations for a halter style apron pattern, please let me know.
20.10.09
skin and bones
Skeleton imagery is all the rage this time of year. My son went through a period of fascination with skulls and bones and we have various examples, mainly fashioned out of ceramic, scattered through out the house all year round.
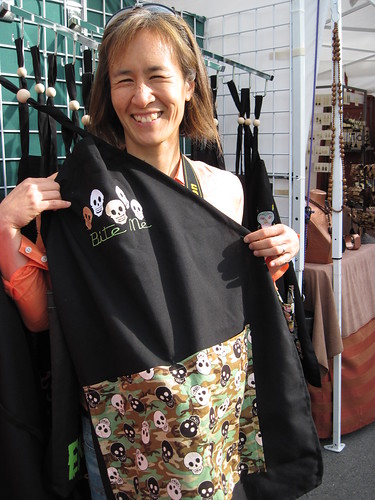
My friend Mary, modeling a macabre apron at the Half Moon Bay Pumpkin festival last Saturday. I was thinking of my blogging friend Rebekah's recent post (http://dontcallmebecky.typepad.com/rebekah/2009/10/day-of-the-dead-embroidery.html) when I took this shot.
Quilt on exhibit at the Pacific International Quilt Festival in Santa Clara. Isn't the detail on this fantastic? She fussy cut skulls from Alexander Henry fabric and I love all the buttons. I wish I had noted the quilter's name - I tried to find it listed in the Program to no avail. I believe it was titled something like "quilting into eternity".
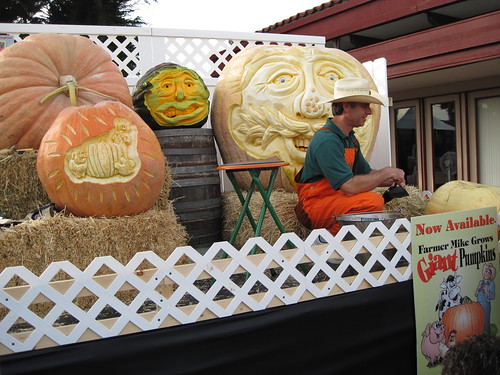
Some miscellaneous pictures from the pumpkin festival. It was unbelievably crowded and consequently very difficult to take pictures.
Someone I know.
The haunted house run by the local theater group was making a killing with their haunted house (no pun intended). Don took the kids in but after only a couple of minutes, Elizabeth ran out crying.
19.10.09
Another quilt show
My sister and I spent Sunday at the Pacific International Quilt Show in Santa Clara. This is a super-fantastic show (more quilts, I think, than in Long Beach). We viewed exhibit quilts for nearly six hours, reserving the last hour for shopping the vendor stalls . Even 7 hours wasn't sufficient time to see everything. During our short shopping frenzy, I recall my sister exclaiming, "STEP AWAY from the fabric, just step away!!!" I suppose leaving only one measly hour for shopping was a good thing... for the pocketbook at any rate.
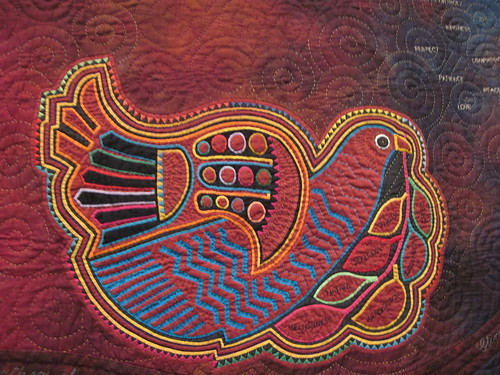
This was one of my favorites in the South African section of the World exhibit.
JennidotL commented on flickr that this is a Mola. I had to google "mola" because I was ignorant of the term. It refers to the applique technique used for the bird at the center of the quilt. I also loved the hand quilted swirls and brilliant colors the quilter used.
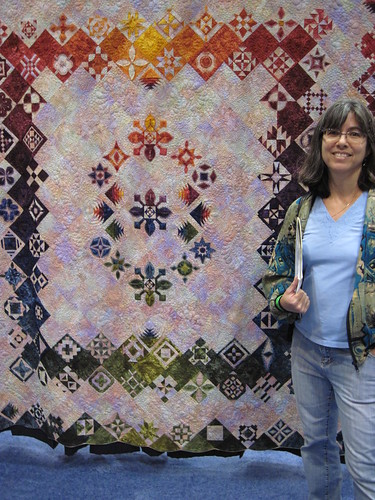
The quilter noted that she started out making Dear Jane blocks with the intention of making the entire Dear Jane quilt but at some point stalled out on the project and found a new way to make incorporate the blocks she had completed into a new and original design.
The quilt above won "Best World" and is by Meri Henriques Vahl from Santa Cruz . My sister who is also from Santa Cruz is an acquaintance, she recalls Meri telling that could never seem to follow the instructions in a quilting class - she always had her own vision of what she wanted to do. We attended the Santa Cruz guild show last year where she had some really stunning quilts on display.
I have more to share, but that's all for today.
I apologize for the poor quality of my photos which cannot do justice to these quilts, but I wanted to focus on enjoying the quilts on exhibit and not on taking good photos. I've also not included attributions, however, if you're interested, more info info is available at www.quiltfest.com and clicking on the Pacific Quilt show link.
This was one of my favorites in the South African section of the World exhibit.
JennidotL commented on flickr that this is a Mola. I had to google "mola" because I was ignorant of the term. It refers to the applique technique used for the bird at the center of the quilt. I also loved the hand quilted swirls and brilliant colors the quilter used.
My sister:
The quilter noted that she started out making Dear Jane blocks with the intention of making the entire Dear Jane quilt but at some point stalled out on the project and found a new way to make incorporate the blocks she had completed into a new and original design.
The quilt above won "Best World" and is by Meri Henriques Vahl from Santa Cruz . My sister who is also from Santa Cruz is an acquaintance, she recalls Meri telling that could never seem to follow the instructions in a quilting class - she always had her own vision of what she wanted to do. We attended the Santa Cruz guild show last year where she had some really stunning quilts on display.
I have more to share, but that's all for today.
I apologize for the poor quality of my photos which cannot do justice to these quilts, but I wanted to focus on enjoying the quilts on exhibit and not on taking good photos. I've also not included attributions, however, if you're interested, more info info is available at www.quiltfest.com and clicking on the Pacific Quilt show link.
11.10.09
when inspiration strikes
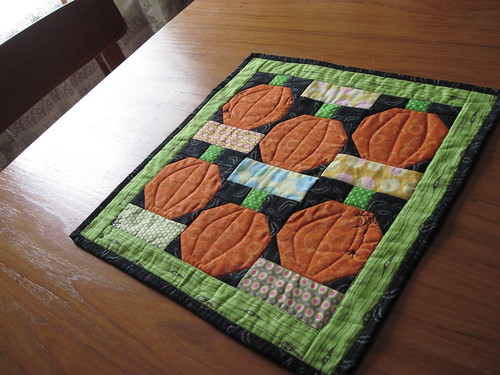
My brother Ken was coming to town for his birthday and annual visit to treat our Dad to a 49ers game and I thought I'd make him some potholders.
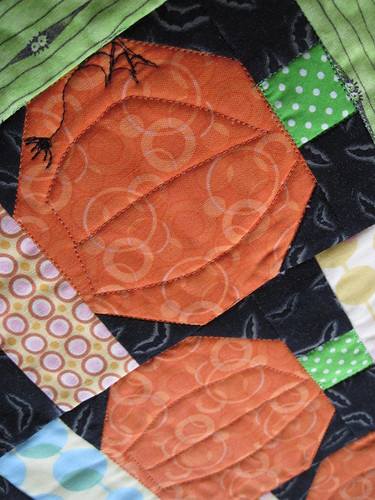
I had some leftover orange squares I had cut out for my snowball quilt but thought they were to "pumpkin-y". Hmmmmmm
My orange squares were a bit small for potholders, but what if I made several pumpkins and combined them with some stash fabrics?
I like the way the eyes ended up peeking over the top of the pumpkin stem.
I had only a few hours to throw it together -- Friday evening and Saturday morning -- nothing like a fast approaching deadline to kick up one's creative juices.
I used a fat quarter of a vintage looking Halloween print for the back (sorry, not pictured here). The binding is completely machine sewn to save time, a technique I have obviously not mastered!
9.10.09
Blogger's Quilt Festival
I've decided to get over my shyness and join the Blogger's Quilt Festival hosted by parkcitygirl.blogspot.com. This is the quilt I've chosen to share:
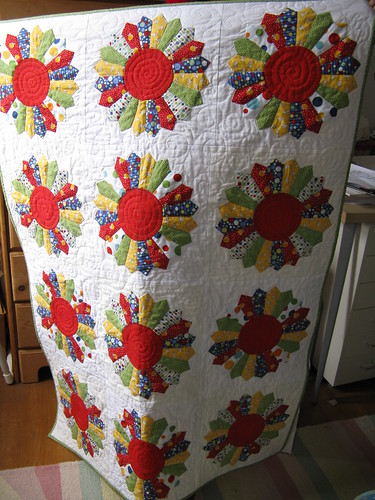
I wish I had a better picture of the entire quilt, if given the chance I'd reshoot with my new camera, but the quilt is long gone... gifted to my niece's 2nd baby.
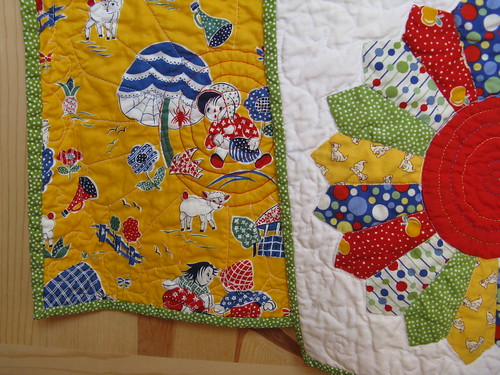
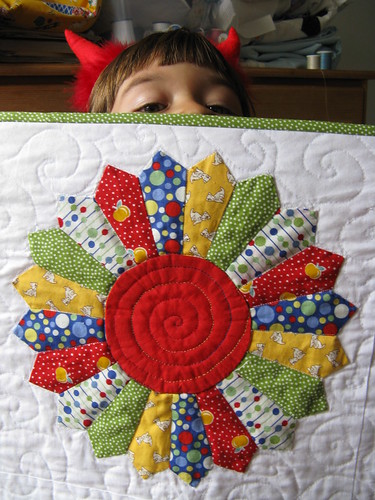
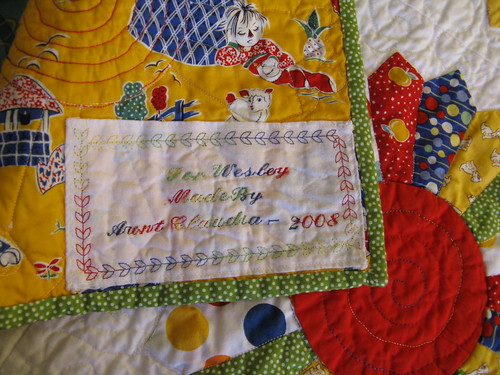
This is the first quilt I made after purchasing my Babylock at the Int'l Quilt Festival in Longbeach last summer (08). I came home from the show energized and inspired to sew! I had met Elinor Burns at the show when I purchased the Babylock, already owned her book "Egg Money Quilts" and had a sizable stash of depression-era prints calling out to me. It seemed apropos that I make something from her book. I opened the book and my eye went immediately to the Dresden Plate block. I knew I wanted to make something bright and in primary colors. I also had my eye on this cheerful fabric at Beverly's for the backing. It coordinated so well with with the fabric in the Plates.
Surprisingly, I did not find it tremendously difficult to piece and assemble. I followed Burns' instructions which are very clear and use many time-saving techniques such as chain piecing.
The Plates are attached to the background fabric by machine using non-filoment thread and my machine's blind hem stitch. I chose silk variegated thread to stitch free-motion with the machine a swirl in the centers of the red circles and free-motioned (no marking) large swirls in the background.
I chose from my machine's various embroidery stitches to create the label:
5.10.09
getting things done
Sometimes it doesn't seem like I'm getting anything accomplished because I haven't had a completed quilt to show off in many months. But I'm chipping away at the pile with four quilts in various stages of doneness. Does anyone else work this way?
This one is a straightforward snowball I've been futzing with for about a year. All the individual snowball pieces are cut and pieced and the top is about halfway assembled. Most likely it'll be on the small side and I'll have to think about borders soon. Any ideas?
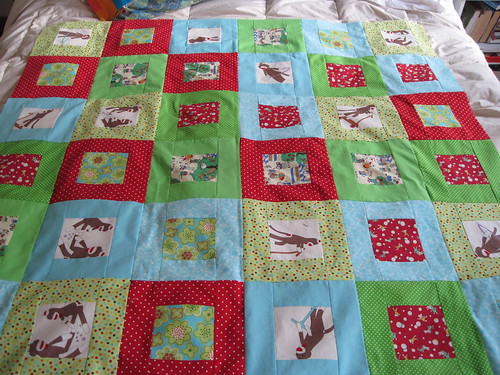
The monkey top is all pieced. It's interesting working on a quilt where I am lending my quilting expertise and leaving all of the design decisions to my friend. It's her first quilt and I think it's looking pretty good so far.
My assistant.
30.9.09
Back from the Dead
My blog, that is!
First, there was the family vacation (which was completely unplugged), then we lost our internet at home, and then the kids' school started back up. I'm not entirely sure I can make the time to blog regularly, but I'm going to give it a try.
I have been sewing and currently have one (almost) finished quilt top.
I'm calling it my Color Block quilt. The inspiration came wanting to work in a couple of solid fabrics I had recently acquired into a project -- a tangerine and a maroon. I kept added some prints and a couple more solids as I went. The quilt built itself quite organically. The block is a super-simple pattern from Quilts & More magazine. The pattern calls for 99 8" blocks - however, when I finished with the piecing, I was disappointed to find this quilt to be a bit narrow for my bed and I'm considering adding a border on the narrow sides in maroon.
I then pulled out an old WIP - a snow ball quilt using mainly green and pink prints with hand dye batiks.
I really regret making the individual blocks so small ... 4 inches, I believe. What was I thinking? Too much piecing for a fairly small-ish quilt. Never again!
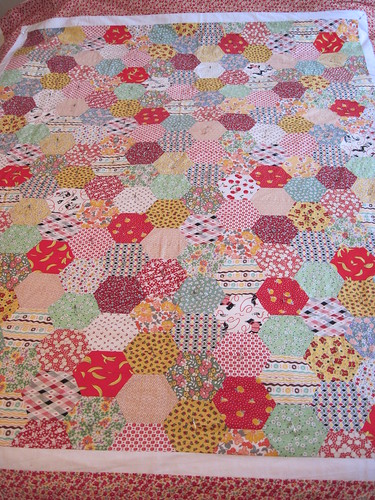
And finally, I'm about halfway through with the hand quilting on my hexagon quilt.
I was horrified to find Axel nestled within my quilt hoop when I had put it down momentarily to check something on the stove. He managed to miss injury on about 4 needles!
9.8.09
5.8.09
Monkeys, Hexes and more!
I've finally found my sewing groove and have been madly stitching away since Sunday. First up, was a simple tote bag I slap dashed together for my daughter. By "slap-dashed" I mean I was in a hurry to do some quilting, so the bag was about a 2 hour project.
She choose the fabrics, which put to use some rather tacky prints for which I had stashed away to make my son a quilt but had ended up using Bali Pops instead. I foundation pieced roughly cut strips onto my lining fabric (flannel) and sewed a separate lining as well. I experimented with external handles for the first time, which I think turned out well as they're sturdy and can take a moderate amount of weight.
She promptly stuck a Princess button on the front and hauled it off to day camp. It coordinated perfectly with her socks!
About the time I was finishing the handles on the tote bag, my friend arrived to work on her monkey baby quilt. This is what we got done by the end of the day:
My friend is new to quilting and sewing, and she struggled with stitching an accurate 1/4" seam, even with the 1/4" seam foot on my machine and her pinning of pieces was all wonky. I found I had to suppress all of my "perfectionist" tendencies and let her work it out. How else can you learn? Fortunately, the simple block pattern is a forgiving one and I'll show her how to trim down the finished blocks to consistent sizes once we get to that point.
Aren't they cute?
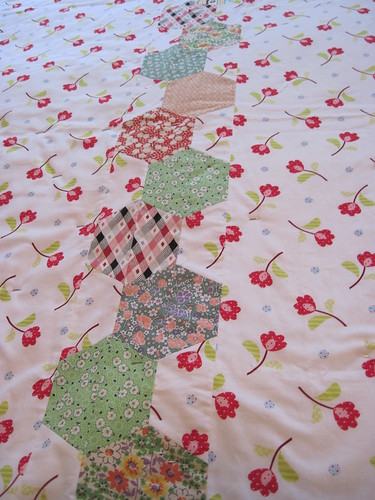
Lastly, the hexagon quilt. It's been sitting around waiting for me to decide what to do with the back. I totally screwed up and not only bought insufficient fabric, but then proceeded to cut it up the wrong way. Eventually, I was able to re-piece, running a line of leftover hexes down the middle and it still was too small! Then I cut some borders out of the leftover front border print fabric. I literally had only tiny scraps left but it worked!
I pinned it together last night.
Usually, I use baste spray, but I'm still hanging onto the notion that I'm going to hand quilt with perle cotton embroidery floss. I'm waffling though, as I hadn't intended to have a pieced back and am not sure how my pattern will look going across the hexes on the back.
Any ideas/opinions on what I should do?
Subscribe to:
Posts (Atom)